
I bought two things at the antiques emporium I blogged about last time: a vintage scale and an old (1875) copy of Ivanhoe (only $10!). I really like the way antique scales photograph, especially with a little texture added.
Here’s the original photo:

An OK shot, but the nice oxidation and color are kind of lost with the white background. So I got closer. . . .
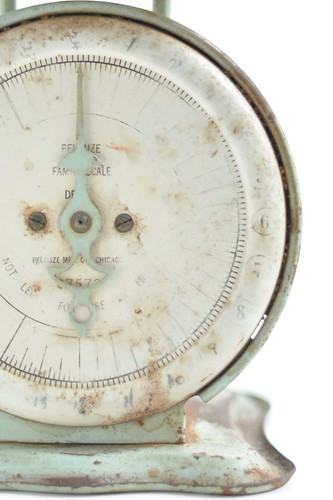
I still wasn’t satisfied, so I applied a texture that resembles wax paper, and used the magic eraser tool in Photoshop Elements to remove the texture from the scale itself.

Much easier than schlepping an antique scale around, looking for an interesting background. It was also pouring outside, and I needed a photo for my 365 project.
Great weekend, everyone!
{carole}


Nice !
Thank you!
Oh, that’s a beauty! Gorgeous color on her still. You will have lots of fun having photo shoots with her.
Thanks, Maureen. I really appreciate your support on instagram too. Still learning my around there.
It took me quite a while to understand what you had done but when I got it, it was a bog aha moment. Well done!
The scales are for decoration or will you use them? My best friend collects scales, especially those tiny ones that were used to weigh gold, with tiny little stones.
Sorry if it was confusing, Caroline. If I were a techie, I’d include screen shots of my process. Alas, I am not. 🙂
I bought the scale mostly for photography purposes, but will definitely display it somewhere. Your friend’s collection sounds wonderful.
I like the way many of your blog entries contain mini-lessons in photographic theory and practice.
Thanks (as always)!
Oh, thanks, but I’m not a teacher at all! I just like to share tips and tricks I’ve learned along the way. 🙂
Looking good! I love the character of the scale.
How did you isolate the image of the scale from the background? Did you have to do that by hand?
When I work with textures, I use layers in Photoshop. I drag the texture layer over the original image, then use a tool called the “magic eraser” to click and drag over the image and “erase” until the texture is gone in that particular area. You can adjust the opacity of the texture layer so when you do the erasing, some or all of the texture is removed. Kim Klassen has wonderful videos that demonstrate this if you’re interested:
http://bit.ly/oXNyQO
Spectacular results with the wax paper texture! I know your plate is quite full these days, Carole, but I’d love to see this in the WordPress Weekly Photo Challenge, which happens to be TEXTURE this week! Check it out at (http://dailypost.wordpress.com/category/photo-challenges). You would just be looking at inserting a couple more tags.
Cheryl, thanks so much for thinking of me, but I just can’t right now. Kind of treading water these days. How are you?
Wishing in one hand, spitting in the other and seeing which gets filled up first. I miss cottage country – not the cottage – the lake. D is taking Thursday and Friday off so we can get a ‘fix’ but staying in a motel in Parry Sound. I wish the cabin renos weren’t going so slowly …
It’s a long process for sure, but so worth it, Cheryl. Hang in there!
Wow-I love this! It would be so great blown up really big on a kitchen wall (in my beach house. Just kidding. Sort of 🙂 )
I’m so jealous that you know how to use photoshop.
Best,
SP
Haha, thanks, Slim! You give me way too much credit. I just barely get around Photoshop and usually use Elements, a watered-down version.
Very cool – playing around with things really makes a difference.
Thanks, Jennie. It is something that I love doing.
Pingback: Mexico Wedding Expert » French Country Inspired Lunch from Valley & Co.
Pingback: French Country Inspired Lunch from Valley & Co.